Author:Andy
Released:January 8, 2026
That one ugly crack in your tile floor doesn’t mean you need a week of jackhammering or a pricey contractor. A lot of homeowners think a broken tile means replacing the whole floor, but there are professional tricks that can make cracks nearly disappear.
Whether it’s a tiny hairline crack or a bigger chip, learning how to fix ceramic tiles yourself can save your floor and your wallet. With just a few hours and the right supplies, you can bring back that smooth, clean look without a major renovation headache.

Identifying The Culprit Behind Your Cracked Floor Tile
Before reaching for a cracked tile filler, it is essential to understand why the damage occurred. Tiles are incredibly durable under compression, but they are brittle and sensitive to movement beneath them.
A crack in tile floor surfaces usually stems from one of four primary issues: sharp impact, subfloor movement, thermal expansion, or improper installation.
Impact Damage Vs. Stress Cracks
If you see a localized spiderweb pattern, you are likely looking at impact damage, perhaps a heavy pot dropped in the kitchen. However, a long, straight crack running across multiple tiles often signals a reflective crack from the concrete slab underneath.
According to the Tile Council of North America (TCNA), most structural tile failures are caused by the lack of movement joints or a subfloor that flexes beyond the tile's tolerance.
Environmental Factors
In regions with extreme temperature swings, porcelain and ceramic expand and contract. If the installer didn't leave a sufficient gap at the perimeter of the room, the pressure has nowhere to go but up, resulting in a cracked porcelain tile.
Understanding these causes helps you determine whether a surface-level fix, like cracked floor tile, will last or if the tile is likely to shift again.
Once you've confirmed that the tile is still firmly bonded to the floor and the crack is stable, you can proceed with a non-invasive repair. This transition from diagnosis to action is where the real savings begin.
Assessing The Damage: When To Repair Vs. Replace
Not every broken tile floor is a candidate for a no-removal fix. You must perform a tap test to check the structural integrity of the damaged area.
Take a screwdriver handle or a heavy coin and lightly tap the tile. A solid thud means the tile is still well-bonded to the thin-set mortar. A hollow click or ringing sound indicates the tile has delaminated from the floor.
The Repairability Scale
- Hairline Cracks: These are perfect for repairing cracked tile without removing. They are mostly aesthetic and can be filled with high-viscosity resins.
- Wide Gaps (over 1/16 inch): These require a more substantial cracked floor tile repair using two-part epoxies and color-matching pigments.
- Shattered Tiles: If the tile is in more than 3 or 4 pieces, or if the pieces are loose, you should likely replace the broken tile floor sections entirely to ensure a level surface.
If your tile passes the tap test, you are ready to choose your materials. The goal is to find a filler that mimics the light-reflective properties of the surrounding glaze, whether you are dealing with a cracked bathroom tile repair or a high-traffic hallway.
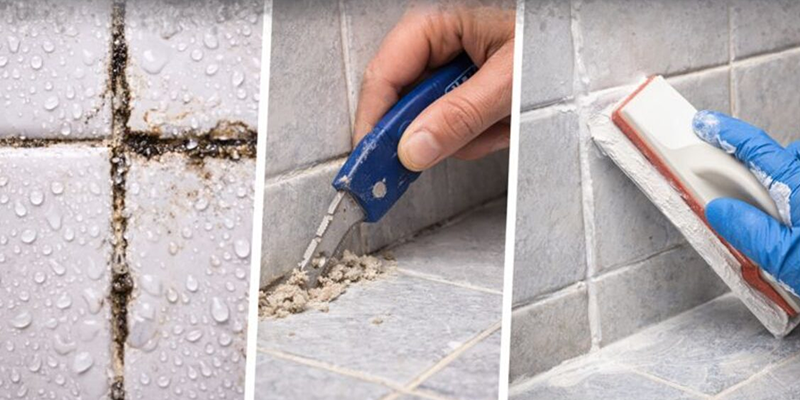
The Professional Approach To Ceramic Tile Crack Repair
To fix cracked ceramic tile surfaces effectively, treat the crack like a surgical incision. The secret to a repair that lasts for years is all in the preparation. You cannot simply smear filler over a dirty crack and expect it to hold.
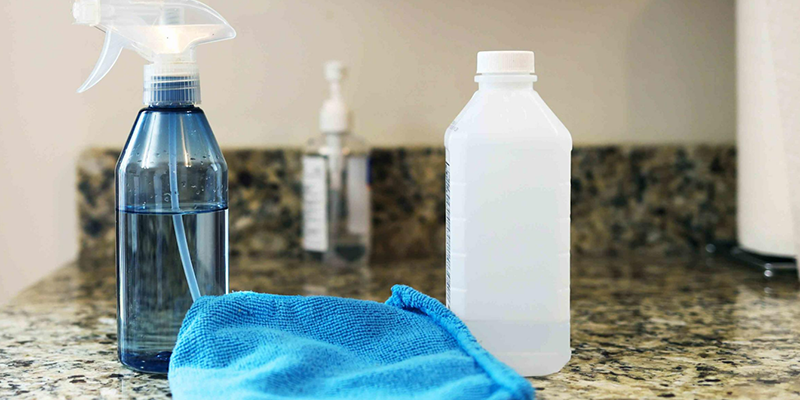
Step 1: Deep Cleaning And Degreasing
Use a small brush and 90% isopropyl alcohol to scrub the inside of the crack. Dust, mop water residue, and oils will prevent the adhesive from bonding. For a cracked porcelain tile, which is denser and less porous than ceramic, this step is even more critical.
Ensure the area is bone-dry before proceeding; even a microscopic amount of moisture can cloud the epoxy.
Step 2: Selecting The Right Filler
For most interior floors, a two-part clear epoxy is the gold standard. It provides the structural strength needed to weld the crack sides together.
If you are working on a floor tile chip repair, you might prefer a light-cure acrylic resin, which hardens instantly under a specialized UV blue light, similar to the technology used in dental fillings.
Step 3: The Filling Process
Using a toothpick or a very fine putty knife, work the cracked tile filler into the void. Overfill the crack slightly, as most resins will shrink marginally as they cure.
For porcelain tile crack repair, you want the filler to be as flush as possible to avoid a bump that can catch dirt over time.
As the filler begins to set, the challenge shifts from structural stability to aesthetic camouflage.
Mastering Color Matching And Texture Blending
The most common mistake in ceramic tile crack repair is using a single, flat color. Real tiles have depth, variegation, and often a slight sheen. To truly fix cracked floor tile issues and make them disappear, you must layer your colors.
Creating The Base Tint
Most repair kits come with primary color pigments. Start with a base that matches the lightest tone in your tile. If you are dealing with a cracked marble tile, incorporate veining by applying a secondary, darker tint with a needle-thin brush while the base is still tacky.
Managing The Gloss Level
- Matte Finishes: Once the filler is dry, lightly buff it with a high-grit sandpaper (1000-2000 grit) to take the shine off.
- High-Gloss Finishes: Use a clear-coat glaze or even a drop of high-quality clear nail polish to replicate the glass-like surface of polished porcelain.
For those working with natural stone, the Marble Institute of America recommends using polyester resins specifically formulated for stone, as they provide better polishing and blending than standard hardware-store epoxies.
Special Considerations For Cracked Bathroom Tile Repair
Bathrooms present a unique challenge: constant moisture. A cracked bathroom tile repair must be 100% waterproof to prevent water from seeping into the subfloor, which can lead to mold and rot.
Waterproofing The Seal
When you repair cracked tile in a shower or near a tub, ensure the epoxy is rated for submerged or wet environments. After the repair is cured, applying a high-quality penetrating sealer over the entire tile and the surrounding grout lines provides an extra layer of protection. This is especially important for cracked marble tile, which is naturally porous and prone to water staining.
Grout Integration
Often, a crack in the tile will extend into the grout line. Do not use tile filler for the grout. Instead, use a matching grout caulk or a small amount of fresh grout mixed with a bonding agent. This maintains the floor's flexibility and prevents the repair from popping out during the next temperature shift.
Recommended Tools And Materials For Tile Restoration
To achieve a professional result, avoid the all-in-one cheap kits found in bargain bins. Instead, assemble a kit that allows for precision.
Two-Part Clear Epoxy: Look for brands like PC-Products or specialized stone epoxies.
Pigment Powders: Fine earth pigments or liquid tints designed for resins.
Leveling Tools: Single-edge razor blades are perfect for scraping excess filler off the surface of a porcelain tile crack repair without scratching the glaze.
Applicators: Fine-tipped syringes or dental picks for injecting resin into hairline cracks.
Finishing: A variable-speed rotary tool with felt buffing wheels can help blend the repair into the surrounding tile texture.
If you find that the damage is too extensive for these methods, you may eventually need to replace broken tile floor sections. However, for 80% of residential damage, these no-removal techniques are more than sufficient.
Long-Term Maintenance: Preventing Future Breaks
Once you have completed your floor tile chip repair or crack fill, the goal is to ensure you never have to do it again. Maintenance is the final step in any sustainable home remodeling mindset.
- Use Area Rugs: In high-impact zones like the kitchen work triangle, a rug can absorb the shock of dropped items.
- Check Your Grout: Cracked grout is often a precursor to cracks in tile floors. If the grout is missing, the tile has room to move and snap.
- Avoid Harsh Chemicals: Acidic cleaners can etch the filler and the tile glaze, making the repair more visible over time. Use pH-neutral cleaners to maintain the integrity of the resin.
Tile Repair Made Simple
Repairing a broken tile floor is a rewarding project that combines technical skill with a touch of artistry. By choosing to repair cracked tile without removing it, you save time, reduce construction waste, and master a skill that keeps your home in top condition.


-
Home Improvements
Warm Minimalist Home Decor Ideas That Feel Simple But Comfortable
January 10, 2026
-
Home Improvements
How to Turn Your Unfinished Basement Into a Luxury Suite for Under $5k
January 5, 2026
-
Home Improvements
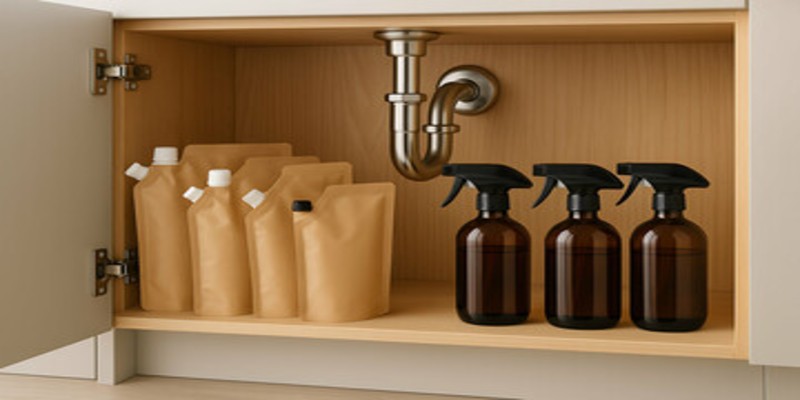
Smart Under-Sink Caddies For Hidden And Harmonious Storage
November 17, 2025
-
Home Improvements
Frameless Glass Shower Enclosures For Open-Concept Upgrade
November 17, 2025
-
Home Improvements
Minimalist Mirrors With Integrated Lighting For Calm Reflections
November 11, 2025
-
Home Improvements
Tile Refinishing: A Cost-Smart Way To Restore Calm, Modern Bathroom Surfaces
October 30, 2025