Author:Arooba
Released:November 22, 2025
Bathroom mold affects 87% of homes according to environmental studies, making it one of the most common household maintenance challenges. Mold grows when three conditions are present simultaneously: moisture levels above 60% relative humidity, temperatures between 77-86°F, and organic matter such as soap scum or skin cells on surfaces.
Bathrooms naturally provide all three conditions, which explains why mold appears even in well-maintained homes. Prevention focuses on controlling moisture through ventilation, daily maintenance habits, material selection, and targeted cleaning of high-risk areas.
What Daily Habits Actually Prevent Mold Growth
Removing Surface Water Immediately After Showers
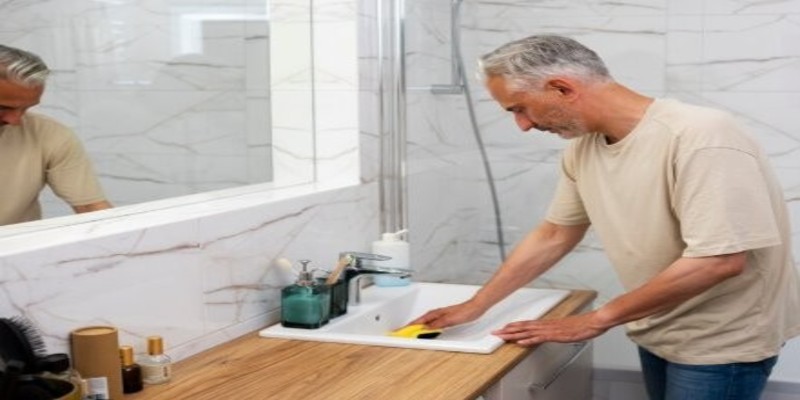
Use a squeegee on all shower walls, doors, and glass enclosures within one minute of finishing your shower. This single action removes 75-90% of surface water in under 60 seconds. Focus on squeegee pressure in corners, seams, and bottom edges where water naturally pools. Water left on surfaces takes 2-4 hours to evaporate completely, maintaining high humidity levels that promote mold growth during this period.
Drying Towels and Bath Mats Properly
Hang towels on bars with 3-4 inches of space between each towel for air circulation on all sides. Towels pressed against walls or stacked on single hooks stay damp for 8-12 hours, rather than the usual 2-3 hours. Move wet towels outside the bathroom after use to reduce humidity levels—spread bath mats flat in well-ventilated areas rather than leaving them bunched on the floor. Wash bath mats weekly in hot water above 140°F to kill mold spores that develop in fabric fibers.
Managing Shower Curtains and Doors
Fully extend shower curtains after each use to maximize drying surface area. Bunched curtains trap water in folds, creating wet spots that develop mold within 48 hours. Wash fabric shower curtain liners monthly in hot water with 1/2 cup white vinegar. For shower doors, squeegee both sides, then leave the door slightly open for 30 minutes to allow air to circulate inside the enclosure.
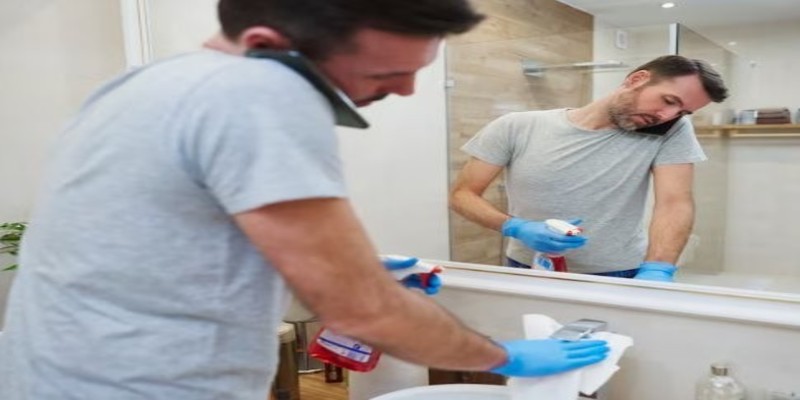
Which Cleaning Solutions Work on Early Mold Spots? White Vinegar for Regular Maintenance
Pour undiluted white vinegar (5% acidity) into a spray bottle and saturate visible mold spots. The acetic acid in vinegar kills approximately 82% of mold species. Allow 60 minutes of contact time before scrubbing with a stiff nylon brush. Rinse thoroughly with clean water and dry the area completely. Vinegar works best on non-porous surfaces like tile, glass, and acrylic. For porous grout, apply vinegar twice, allowing full contact time between applications.
Hydrogen Peroxide for Deeper Penetration
Use a 3% hydrogen peroxide solution in an opaque spray bottle to prevent light degradation of the compound. Spray affected areas until completely saturated and wait 10-15 minutes for penetration. Hydrogen peroxide reaches deeper into porous materials than vinegar and provides a mild bleaching action that removes mold stains from light-colored surfaces. Scrub treated areas with a brush and rinse. Hydrogen peroxide breaks down into water and oxygen within hours, leaving no chemical residue.
Baking Soda for Textured Surfaces
Mix three parts baking soda with one part water to create a thick paste. Apply generously to moldy grout, caulk, or textured tile surfaces. The paste consistency allows extended contact time on vertical surfaces. Let the paste dry completely for 4-8 hours or overnight. The abrasive texture of dried baking soda removes surface mold during scrubbing, while its alkaline pH (around 9) inhibits regrowth. Scrub vigorously with a stiff brush and rinse thoroughly.
How to Maintain Problem Areas That Attract Mold: Sealing and Replacing Grout Lines
Test the effectiveness of the grout sealer annually by placing water droplets on the grout surfaces. Properly sealed grout causes water to bead and roll off rather than absorbing into the porous material. If water soaks into the grout within 5-10 seconds, clean the grout thoroughly with a grout brush, then apply a fresh penetrating sealer. Replace cracked or crumbling grout immediately by removing damaged sections to a depth of 1/8 inch using a grout removal tool. Fill with new grout that matches the existing color and texture.
Consider upgrading to epoxy grout during renovations, as it never requires sealing and resists mold growth indefinitely.
Inspecting and Fixing Under-Sink Areas
Check under bathroom sinks monthly for signs of leaks, including water stains, warped cabinet floors, or musty odors. Even small drips from supply line connections or P-trap fittings create constant moisture that promotes hidden mold growth. Tighten loose connections with an adjustable wrench and replace worn rubber washers. Place silica gel packets or activated charcoal containers inside cabinets to absorb excess humidity. Replace moisture absorbers every 2-3 months, or when they become fully saturated.
Replacing Damaged Caulk Promptly. Inspect caulk lines around tubs, showers, and sinks every 4-6 weeks. Press firmly along caulk lines to test flexibility. Stiff, cracked, or separated caulk allows water to seep behind fixtures into wall cavities, where extensive hidden mold can develop. Obliterate old caulk using a caulk removal tool, ensuring no residue remains. Clean surfaces with rubbing alcohol and allow to dry for 2-3 hours. Apply fresh silicone caulk explicitly rated for bathrooms, which contains mildewcides that inhibit mold growth for 5-7 years.
When Professional Mold Removal Becomes Necessary
Call professional mold remediation services when visible mold covers more than 10 square feet of surface area. Large-scale infestations require containment procedures, HEPA filtration equipment, and proper disposal of contaminated materials that DIY methods cannot provide. Professional remediation prevents mold spores from dispersing throughout the home during cleaning.
Hidden mold behind walls, under flooring, or in ceiling cavities requires professional detection and removal. Persistent musty odors without visible mold growth indicate concealed infestations. Professionals use moisture meters, thermal imaging cameras, and inspection borescopes to locate hidden mold without unnecessary wall demolition.
Recurring mold despite repeated cleanings signals underlying moisture sources that require professional diagnosis. Problems include inadequate ventilation systems, plumbing leaks within walls, or groundwater infiltration through foundations.
Professional remediation costs for small bathroom projects treating 10-25 square feet range from $500 to $ 1,500. Medium-sized projects addressing 25-100 square feet cost
$1,500-3,000. Extensive remediation requiring structural repairs exceeds $10,000.
Begin prevention by addressing ventilation through fan upgrades and consistent operation. Implement daily squeegee use and fix plumbing leaks immediately. These actions prevent the conditions that allow mold establishment.


-
Home Improvements
Jewel Tone Interior Design: Rich Color Ideas For A Bold Home
January 19, 2026
-
Home Improvements
How To Use Natural Stone To Create a Calm Bathroom
November 25, 2025
-
Home Improvements
Corner Shelves: Functional Storage For Calm Interiors
November 22, 2025
-
Home Improvements
Modular Cabinetry For Efficient And Calming Storage Layouts
November 16, 2025
-
Home Improvements
Planning a Spa-Inspired Bathroom Remodel For Daily Relaxation
November 14, 2025
-
Home Improvements
Bringing Nature Inside: Best Bathroom Plants For a Peaceful Space
November 10, 2025